Hi,
many questions arose to the sanwa stick adapter. So here's a tutorial about assembling the adapter with many pics.

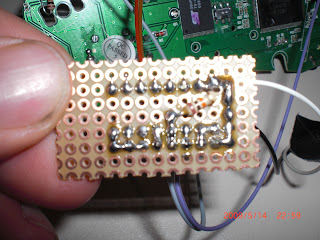
Step 1: Soldier the pcb. Locate the GND and Signals of the directions with a multimeter. I've marked the GND Points with a pencil. Summarizing there're 8 cables going from the PCB:
PCB 1 - Signal Up - White
PCB 2 - GND Up - Black
PCB 3 - Signal Down - Green
PCB 4 - GND Down - Blue
PCB 5 - Signal Left - Purple
PCB 6 - GND Left - Grey
PCB 7 - Signal Right - Orange
PCB 8 - GND Right - Yellow
Then on right hand side USB VSS and USB GND
9 - USB VSS - RED
10 - USB GND - BLACK

Step 2: Assemble 4 resistors and optocoppler on breadbord
Pin 1 - 1K Ohm - USB VSS
Pin 3 - 1K Ohm - USB VSS
Pin 5 - 1 K Ohm - USB VSS
Pin 7 - 1 K Ohm - USB VSS
Step 3: Connect cable to breadboard

Pin 16- PCB 7 - Signal Right - Orange
Pin 15 - PCB 8 - GND Right - Yellow
Pin 14 - PCB 3 - Signal Down - Green
Pin 13 - PCB 4 - GND Down - Blue
Pin 12 - PCB 5 - Signal Left - Purple
Pin 11 - PCB 6 - GND Left - Grey
Pin 10 - PCB 1 - Signal Up - White
Pin 9 - PCB 2 - GND Up - Black
Pin 2 - Black - Right
Pin 4 - White - Down
Pin 6 - Grey - Left
Pin 8 - Purple - Up
Cables are then connected to
luster terminal (right hand side)
Port 1 - Black - Right
Port 2 - White - Down
Port 3 - Grey - Left
Port 4 - Purple - Up
Port 5 - BLACK thick - USB GND
Use this connector for the Sanwa Stick Cable.
Try to read the schematic

Of course one can use this adapter to make a dual pcb mod. Though set all needed signal to cg which are not cg.


